


How to Mount a Projector to the Ceiling: A Step-by-Step Guide
Dreaming of a dedicated home theater? A ceiling-mounted projector is often the final, essential step in creating that truly professional, permanent setup. It keeps your projector safely tucked away, frees up valuable floor space, and delivers a clean aesthetic that truly elevates your viewing experience.
However, if you've ever considered this project, you've probably felt a wave of anxiety. It's one of the most intimidating DIY tasks. What if it's not secure? What if it's in the wrong spot? What about all those ugly wires dangling down? These are all valid concerns, and rushing into it is a recipe for frustration (or worse, a damaged projector).
This guide is your complete, start-to-finish plan. We will walk you through every critical step—from precise planning and measuring to safely drilling and expertly concealing the cables—so you can get your projector mounted right the first time, confidently.
Before You Drill: Is a Ceiling Mount Your Best Option?
Let's be honest: mounting a projector to the ceiling is a serious commitment of time, effort, and precision. Before you break out the tools, let's confirm it's truly the right choice for your specific home theater setup.
The Pros and Cons of Ceiling Mounting
Pros:
- Permanent & Secure: Once installed, it's a "set it and forget it" solution.
- Space-Saving: Frees up floor space and keeps the projector safe from accidental bumps.
- Professional Aesthetic: With proper cable management, it looks clean and intentional.
- Optimal Placement: Allows you to place the projector exactly where it needs to be for optimal image size and alignment (for traditional, long-throw models).
Cons:

- Complex Installation: It's a high-stakes DIY project requiring precise measurements, finding studs, drilling into your ceiling, and often electrical/cable routing work.
- Cable Management: Running 15+ feet of power and HDMI cables can be challenging.
- Permanence: It's not easily moved once installed, and leaves holes if removed.
The Alternative: The "No Mount" Projector
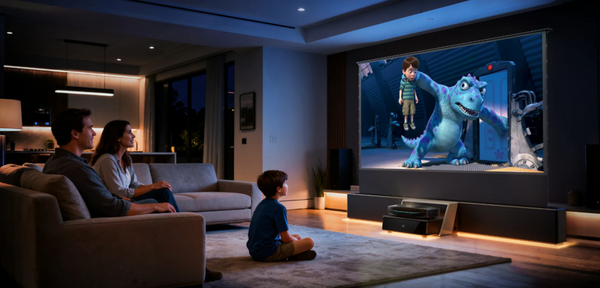
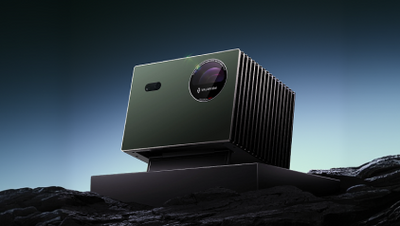
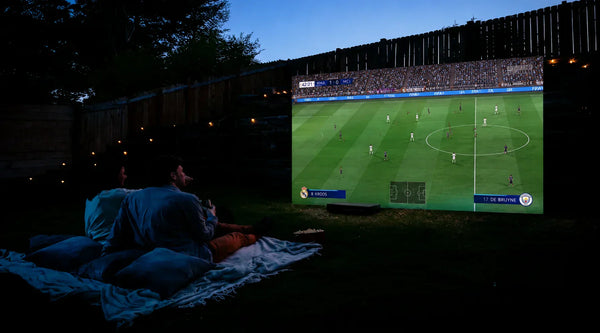
For many modern home theaters, the entire hassle of ceiling mounting is now optional. The biggest advancement in projector technology is the Ultra Short Throw (UST) projector.
Instead of being mounted at the back of the room (or ceiling), a UST projector sits on a standard media console at the front of the room, just inches from the wall or screen. It projects a massive image straight up, providing a stunning 100-120" picture.
The result? You get a cinematic image with zero ceiling holes, zero long cables to hide, and zero complex installation. It's often a 10-minute setup, not a 10-hour project.
Who Should Still Ceiling Mount?
If you own a traditional, long-throw projector, ceiling mounting is still the gold standard for a clean, permanent, and unobtrusive setup. If you're committed to that method, let's make sure you get it done safely and correctly.
Part 1: Preparation & Planning (The 90% Fail-Point)
Do not skip this section. A bad plan is the number one reason for a failed projector installation. The goal here is simple: measure everything precisely so you only have to drill once.
Step 1: Find Your Projector's Exact Location
This isn't a guess; it's a calculation that hinges on your projector's specifications.
- Throw Distance: Consult your projector's manual (or an online projector distance calculator). This will tell you the exact distance your projector needs to be from your screen to achieve the image size you want (e.g., 100 inches, 120 inches). Mark this spot carefully on your ceiling.
- Vertical Offset & Lens Shift: The manual will also specify the "vertical offset" or "lens shift" range. This indicates how high or low the projector lens needs to be relative to the top or bottom edge of your screen. This will determine the length of your mount's extension pole.
Step 2: Choose the Right Projector Mount
- Universal vs. Model-Specific: Most projector mounts are "universal" and come with adjustable arms to fit various projector models. Ensure the mount you choose is rated to hold the weight of your specific projector.
- Flush vs. Telescoping:
- Flush Mount: Sits very close to the ceiling. Best for rooms with very high ceilings or when you want the projector to be as discreet as possible.
- Telescoping (Extension) Pole Mount: The most common type. It allows you to adjust the projector's height, which is crucial for matching your projector's vertical offset and fine-tuning image alignment.
Step 3: Gather Your Tools & Materials
Having everything ready before you start saves immense frustration.
- Projector Mount Kit (with all hardware)
- Drill & appropriate drill bits
- Electronic Stud Finder
- Level
- Tape Measure
- Pencil or marker
- Safety Glasses
- For Cable Management (choose an option): Drywall saw, fish tape, cable routing kit (plastic raceway), or decorative cable sleeves.
- (Optional but Recommended): A second person to help with lifting.
Step 4: Locate a Ceiling Joist (The Most Important Step)
Crucial Warning: Drywall alone cannot safely hold the weight of an expensive projector. It will eventually sag or even fail, sending your projector crashing down. You must anchor the mount to a sturdy wooden ceiling joist (or beam).
- How To: Use your electronic stud finder to locate the edges of a ceiling joist. Joists typically run perpendicular to the longest wall in your room. Mark both edges, then find and mark the center of the joist.
- Align: Your ideal projector location (from Step 1) must fall within the path of a ceiling joist for secure mounting. If it doesn't, you'll need to explore the "Troubleshooting" section below.
Part 2: The Step-by-Step Installation Process
You've done the critical planning. Now, it's time for the physical installation. Remember the old carpenter's adage: "Measure twice, drill once."
Step 5: Attach the Mount Bracket to the Ceiling
- Position: Hold the ceiling plate of your projector mount up to the marked center of your ceiling joist.
- Level: Use your level to ensure the bracket is perfectly straight and aligned.
- Mark Holes: Use a pencil to mark the locations for your drill holes through the pre-drilled holes in the mount's ceiling plate.
- Drill Pilot Holes: Using a drill bit slightly smaller than the lag bolts provided with your mount, drill pilot holes into the marked spots on the ceiling joist.
- Secure the Bracket: Align the mount's ceiling plate with the pilot holes and use your drill (or a wrench) to firmly secure the lag bolts. Ensure it is extremely snug and doesn't wiggle.
Step 6: Attach the Projector to the Mount
Do this on the floor. It is much safer and easier than trying to do it overhead.
- Prepare Projector: Lay your projector upside down on a soft, clean surface (like a blanket on the floor).
- Attach Mount Arms: Locate the mounting holes on the bottom of your projector. Attach the adjustable "arms" or a smaller bracket from your mount kit to these holes using the screws provided.
- Connect Pole (if applicable): If your mount uses an extension pole, secure this to the projector bracket now.
- Tighten: Ensure all connections are secure, but do not overtighten, which could strip threads.
Step 7: Hang the Projector (A Two-Person Job Recommended!)
This is the moment of truth. An extra pair of hands makes this step much safer and easier.
- Lift Carefully: With assistance (if possible), carefully lift the projector (with its attached bracket/pole) up to the ceiling.
- Connect to Ceiling Plate: Align the top of the mount (or extension pole) with the ceiling plate you've already installed.
- Lock in Place: Follow your specific mount's instructions to firmly connect and lock the projector assembly into the ceiling plate. Most mounts have a quick-release or locking mechanism.
- Verify Security: Do not let go until you are 100% confident the projector is securely fastened and locked in place. Give it a gentle tug to double-check.
Part 3: Finishing Touches & Common Problems
The projector is up, but the job isn't quite done. These final steps make all the difference in functionality and appearance.
Step 8: Manage and Conceal Your Cables
This is what separates a professional-looking installation from a "mess."
- Option 1 (Easy & Affordable): Adhesive Cable Raceways. These are plastic channels that stick to your ceiling and/or wall. You simply run your power and HDMI cables inside them. They can be painted to match your decor.
- Option 2 (Professional & Invisible): In-Ceiling/Wall Routing. This is the "hidden" look. It involves cutting small, strategic holes in your drywall (one near the projector mount, one near your receiver/power outlet) and using a "fish tape" to pull the cables through the ceiling or wall cavity. This requires more skill but yields the cleanest result. Make sure you use appropriate HDMI cables for in-wall use.
Step 9: Configure Your Projector's Settings
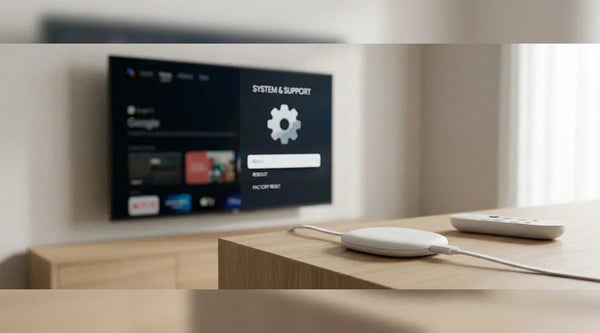
- "My image is upside down!" This is perfectly normal and expected for a ceiling-mounted projector. Don't panic! Go into your projector's main menu, find the "Settings" or "Installation" tab, and select the "Ceiling Mount" or "Invert Image" option. This will flip the picture right-side up.
- Final Alignment: Use your projector's keystone correction, zoom, and focus settings to get the image perfectly square and sharp on your screen.
Troubleshooting: What If...
...There's no stud in the perfect spot?
- Risky Option: Use heavy-duty toggle-bolt or drywall anchors rated for at least 3-5 times your projector's weight. This is generally discouraged for expensive equipment.
- Safe Option (Best): Install "blocking." This involves adding a piece of wood (e.g., a 2x4) in the attic space above the drywall, spanning between two existing joists, then mounting your bracket to that new blocking. If attic access isn't possible, you can surface-mount a decorative wood plank to two joists, and then attach your projector mount to the plank.
...I have a drop ceiling?
- Do NOT mount to the grid tiles themselves. Drop ceiling tiles are not load-bearing.
- You need a special drop-ceiling mount kit that secures to the structural ceiling or joists above the grid, with a pole extending down through a cut-out tile.
...My projector is shaking?
- Ensure all bolts on the mount (both to the ceiling and to the projector) are tightly secured.
- Check if the joist itself is stable.
- Consider adding a vibration dampening plate if the issue persists, though this is rare with proper installation.
Conclusion: The View Is Worth the Climb
Ceiling mounting a projector is a rewarding DIY project that gives you a truly professional, immersive home theater experience. Taking the time to plan your location, find that crucial joist, and neatly manage your cables is the key to a successful, lasting installation.
Now, with your projector securely in place, sit back and enjoy the permanent, stunning, and clutter-free view you've built.
And if, through this process, you found yourself rethinking the complexities of projector installation, remember that for your next upgrade, an Ultra Short Throw laser projector can deliver that same magnificent 100-inch+ screen experience with none of the mounting or cable-hiding hassle!

Be the First to Know
Subscribe for special deals, news, and important product information, and get your exclusive $50 discount.
Related Articles
Dolby Audio Explained: What It Means for Your Home Theater
How to Connect an iPhone to a Projector: A Step-by-Step Guide (Wireless & Wired)
How to Reset Chromecast: The Ultimate Troubleshooting Guide
The Summer of Soccer Is Here — Is Your Backyard Ready?

The Ultimate Guide to World Soccer Match 2026