


Guide to Choosing and Adjusting an Electric Projector Screen
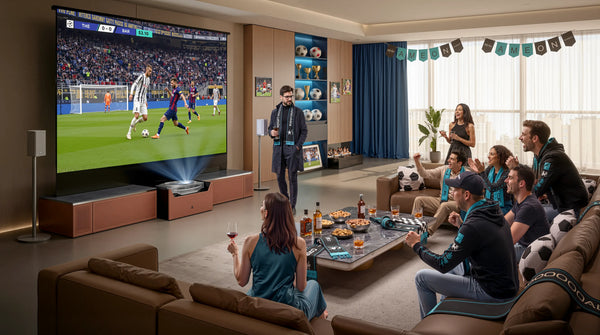
There is an undeniable "wow" factor when the lights dim and a massive cinema screen silently descends from the ceiling or rises from the floor. But if you are in the market for an electric projector screen, you already know that the buying process is rarely that simple.
It can be frustrating to navigate the endless debates about screen tensioning, mounting weights, and ambient light rejection. Worse yet is the anxiety of spending hundreds or thousands of dollars only to end up with a wavy picture or a motor that doesn't drop the screen to the right height.
This guide cuts through the technical jargon to help you choose the right motorized setup for your space and provides clear, step-by-step instructions on how to perfectly tune it once it is installed.
Why Upgrade to an Electric Projector Screen?

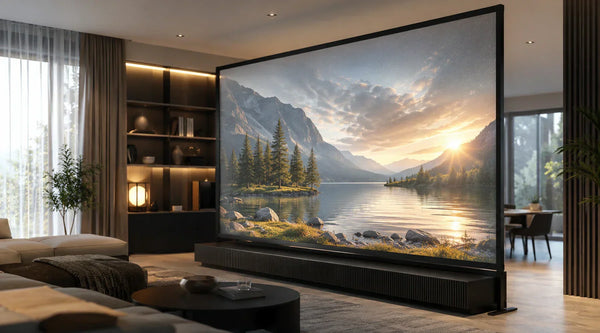
Fixed-frame screens are great for dedicated theater rooms, but they dominate a space. An electric projector screen solves the fundamental living room dilemma: you want a massive 100-inch to 150-inch display for movie night, but you don't want a giant white rectangle taking up your wall space during the day. Motorized screens offer a clean, minimalist aesthetic, retracting out of sight when not in use.
(Check out our comprehensive guide on the different types of projectors.)
Deployment Styles: Drop-Down vs. Floor-Rising Screens
|
Feature |
Drop-Down (Ceiling/Wall) |
Floor-Rising (Motorized) |
|
Best Projector Type |
Standard or Long-Throw |
Ultra Short Throw (UST) |
|
Installation Effort |
High (Drilling, wiring, weight-bearing) |
Minimal (Plug-and-play) |
|
Room Type |
Dedicated Theater / Basement |
Living Room / Minimalist Space |
|
Space Requirement |
Clears floor space; needs ceiling space |
Needs floor/cabinet space; clears walls |
|
Portability |
Permanent installation |
Portable (Can be moved if needed) |
|
The "Wow" Factor |
Cinematic "curtain call" effect |
Modern, high-tech "emergence" effect |
The first major decision is how your screen will enter the room. Your room's architecture and your projector type will largely dictate this choice.
When to Choose a Ceiling or Wall-Mounted Screen
Traditional drop-down screens are ideal for dedicated home theaters or rooms with accessible ceiling joists.
- Best for: Standard throw or long-throw projectors mounted at the back of the room.
- The Catch: Installation can be intimidating. You have to account for the mounting weight, find studs or ceiling joists, and often route power cables through the ceiling to keep things looking tidy.
The Advantages of Floor-Rising Projector Screens
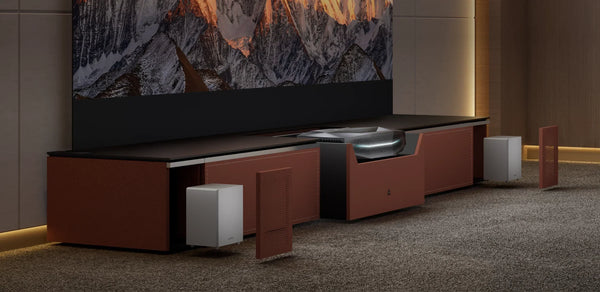
If you cannot drill into your ceiling, are renting, or simply want a more portable setup, floor-rising screens are the modern problem-solver. Housed in a discrete base unit on the floor or a media cabinet, the screen is pushed upward by motorized, scissor-backed mechanics.
- Best for: Ultra Short Throw (UST) projectors, living rooms, and minimalist setups.
- The Integration: Floor-rising models eliminate complex ceiling wiring. For example, systems like the AWOL Vision Motorized Floor Rising Screens simply sit on the floor or a low console. They pair exceptionally well with UST projectors, creating a massive display from just inches away without permanently altering your room's architecture.
Tensioned vs. Non-Tensioned Projector Screens
If you have researched projector screens online, you have likely seen warnings about screen curling.
Why Projector Screens Wrinkle and Curl
Standard, non-tensioned electric screens are essentially a heavy piece of vinyl hanging from a roller. Over time, gravity, temperature fluctuations, and humidity can cause the edges to curl inward, creating "waves" across the viewing surface. If you are watching a movie with panning camera shots, these waves will distort the image, which is highly distracting.
Is Tab-Tensioning Worth the Investment?
In short: yes, especially if you use a UST projector. Tab-tensioned screens use a cable system along the sides of the fabric to pull the screen taut, creating a perfectly flat, TV-like surface. Because UST projectors shoot light at an extreme upward angle, even the slightest wrinkle will cast a massive shadow on the screen. For electric setups, investing in a tensioned screen is the best way to future-proof your home theater.
Screen Materials Matter: ALR vs. Matte White in Motorized Setups
The projector screen material rolling out of that motorized housing is just as important as the motor itself. Your lighting environment dictates the material you need.
- Matte White (For Dark Rooms): If you have light control (blackout curtains or a basement theater), a high-quality matte white surface provides brilliant color accuracy and brightness. For example, the AWOL Vision 100"-120" Matte White Motorized Floor Rising Screen uses top-tier PVC with a 1.3 gain, easily supporting 4K/8K resolution and Active 3D without compromising picture geometry.
- Ambient Light Rejecting (For Living Rooms): If you are watching in a bright room with windows, standard white screens will look washed out. ALR screens use microscopic ridges to reflect projector light toward your eyes while absorbing ceiling light. A specialized screen like the AWOL Vision Cinematic+ ALR Motorized Floor Rising Acoustic Screen is optimized specifically for UST projectors. It rejects 95% of ceiling ambient light and features a unique design detail: the black border at the bottom includes sound-transparent holes, allowing you to place a soundbar or center-channel speaker directly behind the screen without muffling the audio.
Powering and Controlling Your Motorized Screen

Getting the screen to move effortlessly requires understanding your control options.
Hardwired vs. Plug-and-Play Power
Some drop-down screens require hardwiring directly into your home's electrical system, which generally requires an electrician. Plug-and-play models, particularly floor-rising units, operate via a standard wall outlet, making setup significantly easier.
Integrating Remotes and 12V Triggers

Most screens come with an RF or IR remote. However, for a truly seamless experience, you want a 12V trigger. This is a small cable (or wireless USB dongle) that connects your projector to your screen.
- How it works: When you turn on your projector, it sends a signal to the screen to deploy automatically. When you turn the projector off, the screen rolls away. Modern ecosystems handle this brilliantly; for instance, the AWOL Cinematic+ screens sync flawlessly with AWOL projectors (like the LTV-2500, LTV-3000 Pro), creating a unified, one-button home theater experience.
How to Adjust an Electric Projector Screen
Once your screen is powered, you may find that it drops too low or not low enough to align with your projector's image. You do not need to physically move the mounting brackets; you need to adjust the motor's limit switches.
Understanding Limit Switches
Limit switches are small adjustment dials located on the motor housing (usually at one end of the roller tube on drop-down screens, or near the base on floor-rising models). They tell the motor exactly when to stop rolling.
- The "Drop" or "Down" Limit: Controls how far the screen extends.
- The "Retract" or "Up" Limit: Controls where the screen stops when it rolls away (rarely needs adjustment from factory settings).
Step-by-Step Drop Adjustment Guide
Note: Always consult your specific manufacturer's manual, but the general process involves using an Allen wrench or a specialized plastic tool provided with your screen.
- Locate the Limit Switches: Look for two inset screw holes on the motor end of the housing. They are often color-coded (e.g., yellow and white) or labeled with directional arrows.
- Deploy the Screen: Lower the screen using your remote until it automatically stops at its current factory limit.
- Adjust to Increase Drop: If the screen needs to go lower, insert the adjustment tool into the "Down/Drop" switch. Turn it slowly in the "+" direction (usually clockwise). The screen will bump down incrementally as you turn.
- Adjust to Decrease Drop: If the screen drops too far, you must first retract the screen slightly using your remote. Then, turn the limit switch in the "-" direction (usually counter-clockwise) for a few rotations. Deploy the screen again to test the new stopping point. Repeat until perfectly aligned.
- Test the Full Cycle: Roll the screen all the way up and all the way back down to ensure it consistently stops at your newly defined limit.
Building Your Perfect Home Theater
Choosing an electric projector screen does not have to be a guessing game. By evaluating your room's natural light to choose between Matte White and ALR, and measuring your space to decide between a traditional drop-down or a modern floor-rising system, you can build a setup that fits your lifestyle. Take the time to properly tension the fabric and dial in your limit switches, and you will be rewarded with a flawless, cinematic viewing experience that vanishes the moment the credits roll.
FAQs About Electric Projector Screens
Do I need a tensioned electric projector screen?
If you are using an Ultra Short Throw (UST) projector, a tab-tensioned screen is highly recommended. Because UST projectors cast light at a steep upward angle, even minor waves or wrinkles on a standard, non-tensioned screen will cause highly visible shadows and image distortion. Tensioning ensures a perfectly flat, TV-like surface.
How do you adjust how far an electric projector screen drops?
You can adjust the drop limit of your electric screen by turning the "Down" limit switch located on the motor housing. Using the manufacturer's adjustment tool (usually an Allen wrench), turn the switch in the "+" direction to make the screen drop lower, or the "-" direction to make it stop higher. Always make small adjustments and test the screen.
Can I use an electric projector screen during the day?
Yes, but you need the right screen material. For daytime viewing in a room with ambient light, choose an Ambient Light Rejecting (ALR) electric screen. ALR material is engineered to reflect the projector's light directly toward the viewer while absorbing overhead lighting and sunlight, preventing the image from looking washed out.
What is a 12V trigger on a projector screen?
A 12V trigger is a feature that allows your projector and electric screen to sync automatically. When you power on the projector, it sends a signal (via a cable or wireless USB dongle) that tells the motorized screen to deploy. When the projector is turned off, the screen automatically retracts.

Be the First to Know
Subscribe for special deals, news, and important product information, and get your exclusive $50 discount.
Related Articles
How to Create a Modern Living Room with an Ultra Short Throw Projector Cabinet?
Rear Projection Screen Guide: Best Materials Options
How Many Lumens for an Outdoor Projector?
Best Projector for Camping: How to Choose the Right Outdoor Movie Setup

The Best Prime Day Projector Deals 2026: Upgrade with AWOL Vision