


How to Create Halloween Projector Effects: A Step-by-Step Guide
With Halloween just around the corner, the pressure is on to create a display that truly wows the neighborhood. While plastic skeletons and cotton-ball spiderwebs have their place, the most jaw-dropping, spine-chilling houses are now using a secret weapon: digital decorations.
It can seem like a technical challenge, but creating ghostly apparitions in your windows or zombies crawling across your garage is surprisingly simple. You don't need a Hollywood budget—just the right know-how and a few key pieces of equipment.
This guide will walk you through everything, from the basic tools you'll need to pro-level tips that will make your home the talk of the town this Halloween.
Go Beyond Plastic Skeletons: What Are Digital Halloween Decorations?
Before we get started, let's clarify what we're talking about. Digital decorations are simply short video clips, often designed to loop seamlessly, that you project onto a surface to create a stunning illusion. Instead of a static prop, you get a dynamic, moving scene that looks incredibly real.

The most popular types of effects include:
- Window Projections: This is the classic effect. By projecting onto a window from inside your home, you can make it look like ghouls, ghosts, and monsters are haunting your house.
- Surface Projections: Turn any flat surface into a scene from a horror movie. Projecting onto garage doors, exterior walls, or even trees can create large-scale scares.
- Hollusion Effects: This advanced technique involves projecting onto a nearly invisible piece of mesh fabric (called a scrim). The result is a terrifyingly realistic illusion of a ghost or spirit hovering in thin air.
- Pumpkin Projections: Instead of carving, you can project animated faces onto whole pumpkins, making them appear to sing, tell stories, or make spooky expressions.
Your Digital Haunting Toolkit: What You'll Need
Getting started is easier than you think. You only need a few key items to bring your digital nightmares to life.

- A Projector: This is the heart of your setup. While any projector can work, its features will directly impact the quality of your scare (more on this below).
- Digital Decorations: These are the video files of the ghosts, zombies, and ghouls. The undisputed leader in high-quality effects is AtmosFX, which offers a massive library of downloadable scenes for every type of scare imaginable.
- A Projection Surface: This can be as simple as a window or a light-colored wall. For more advanced effects, you might use a sheet, a shower curtain, or a special material like scrim fabric.
- A Media Player: You'll need a way to play the videos. Most modern projectors have a built-in USB port, allowing you to play files directly from a thumb drive. You can also use a laptop or a streaming stick.
- Speakers (Optional but Recommended): Most digital decorations come with spooky audio. Adding sound with a simple Bluetooth speaker is one of the easiest ways to elevate the entire experience.
How to Set Up Your Halloween Projector Effects in 4 Simple Steps
This is where the magic happens. Follow these steps to get your first effect up and running perfectly.
Step 1: Choose Your Location and Effect

Before you plug anything in, decide where you want to create your illusion. Are you trying to spook trick-or-treaters as they walk up to your house? Or create a creepy atmosphere for a Halloween party inside? Match your effect to your goal. A ghost appearing in a window is perfect for street-side viewing, while a haunted portrait is a fantastic indoor scare.
Step 2: Prepare Your Projection Surface
The surface you project onto is key.
- For windows: Clean the glass thoroughly. For the sharpest image, you can tape a thin, white, semi-translucent material (like a frosted shower curtain) to the inside of the window frame. This will capture the projected light beautifully.
- For walls/garage doors: Make sure the surface is a light, solid color. The fewer textures, the better. Remove any obstacles that might cast a shadow.
- For "Hollusion" effects: Tightly hang a piece of sheer fabric (like Hollusion material from AtmosFX or gray tulle from a fabric store) in a dark doorway, between two trees, or in a dim corner. The key is to make it hard to see the fabric itself.
Step 3: Position and Focus Your Projector
Place your projector so its light completely covers your intended surface. It's often best to aim it from a low angle to help hide it. Once positioned, use the focus dial to get the sharpest, clearest image possible. If your image looks slanted or trapezoidal, use the projector's keystone correction feature to square it up perfectly.
Step 4: Connect and Play Your Spooky Scene

Load your digital decoration file onto a USB drive and plug it into the projector. Navigate to the file using your projector's remote and start playback. Be sure to find the "repeat" or "loop" setting in your projector's media player menu so the scene plays continuously without you having to restart it.
Choosing the Best Projector for Halloween: A Pro's Advice
While almost any projector can display an image, certain features are critical for creating a Halloween effect that looks professional and terrifying, not cheap and blurry.
Why Brightness (Lumens) is Your #1 Tool
The biggest enemy of a good projection effect is ambient light from streetlights, porch lights, or even a full moon. A dim projector will look washed out and weak. For an effect that is vibrant, solid, and punchy, you need high brightness. Look for a projector with at least 2,000 lumens to ensure your ghouls and ghosts stand out in the dark.
The Advantage of 4K Resolution for Realism
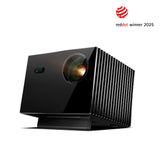
Detail is everything for a believable scare. A low-resolution projector can make your digital decorations look like a pixelated video game from the 90s. A 4K projector delivers the crisp, sharp detail that makes the textures on a zombie's face or the wisps of a phantom look frighteningly real, suspending disbelief for anyone who sees it.
How an Ultra Short Throw (UST) Projector Makes Setup Effortless
This is a game-changer for Halloween effects. Traditional projectors need to be placed far back from the screen, creating a huge hassle.
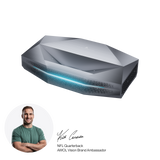
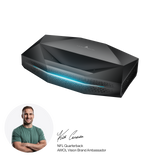
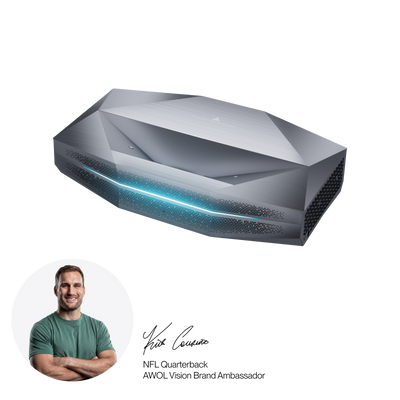
- Easy to Hide: An Ultra Short Throw (UST) projector, like an AWOL Vision model, can be placed just inches from the wall or window it's projecting onto. This makes it incredibly easy to hide behind a couch or under a table.
- No Shadows or Tripping: With the projector so close to the surface, no one can accidentally walk in front of the beam and cast a shadow, ruining the illusion. It also removes a major tripping hazard in a dark room or yard.
- Weather Safe: For window projections, a UST projector sits safely inside your home, far from any potential autumn rain.
Creative Ideas to Take Your Projector Effects to the Next Level
Once you've mastered the basics, try these advanced ideas to truly stand out.

- Project onto Fog: Rent or buy a simple fog machine and project swirling spirits or zombie hordes directly onto the cloud of fog.
- Create a Haunted Portrait: Find an old portrait at a thrift store, cut out the face, and hang a piece of projection material behind it. Projecting a "haunted" face onto it creates an incredible surprise for party guests.
- Summon a Ghost in a Doorway: Use the Hollusion method with scrim fabric in a dark hall for an unforgettable jump-scare as guests walk by.
- Animate Your Pumpkins: Skip the mess of carving. Set three pumpkins on your porch and use projection mapping software to project singing or storytelling faces onto them.
Halloween Projector Effects FAQ
Can I use my everyday home theater projector for Halloween effects?
Absolutely! In fact, a high-quality home theater projector is often the best choice because it will have the high brightness and 4K resolution needed for a realistic effect.
What's the best material to project on for ghosts?
For a "hollusion" or floating ghost effect, the best material is a gray or black mesh scrim or tulle fabric. For window projections, a frosted vinyl film or a simple white shower curtain will provide a bright, crisp surface.
Can I project Halloween images directly onto my house?
Yes, this is a very popular method. It works best on light-colored, flat surfaces like siding or a garage door. Just be aware that windows and dark trim can break up the image.
How do I hide my projector so it doesn't ruin the illusion?
The easiest way is to use an Ultra Short Throw (UST) projector, which can be placed right next to the wall or window. For long-throw projectors, hide them behind furniture, inside a decorative planter, or use a small fake tombstone or pumpkin to block the view from the street.

Be the First to Know
Subscribe for special deals, news, and important product information, and get your exclusive $50 discount.