


Projector Angle Guide: How to Fix Distorted Images (and Avoid Them Entirely)
Setting up a home theater would be easy if we all had perfectly symmetrical, windowless rooms dedicated to movies. But in the real world, you have ceiling fans, odd corners, and furniture that often force you to place your projector off-center.
This leaves many users asking: Can I place my projector at an angle and still get a perfect image?
The short answer is yes, but you will need to rely on specific correction tools to fix the inevitable distortion. While placing a projector at an angle is possible, understanding the difference between Lens Shift and Keystone Correction is critical to maintaining high-definition clarity.
Can You Project from the Side of the Room?
Yes, modern projectors can project from the side, but doing so creates a trapezoidal image (where the image looks like a slanted trapezoid rather than a perfect rectangle).
To fix this, projectors use one of three methods. The method you use will determine your final image quality:
- Lens Shift (The optical, lossless solution).
- Keystone Correction (The digital, software-based solution).
- The UST Solution (Switching to Ultra Short Throw to avoid the problem entirely).
Optical vs. Digital Correction: What’s the Difference?

Both features aim to "square" your image, but they work on entirely different principles.
Lens Shift (Moving the Glass)
Lens Shift is the gold standard for placement flexibility. It allows you to physically move the lens assembly inside the projector housing—shifting the image up, down, left, or right—without moving the projector itself.
The Benefit: Because this is an optical adjustment, the pixels are not warped or compressed. You retain 100% of your projector’s native resolution.
Learn more in our guide: Optical Zoom vs. Digital Zoom.
Keystone Correction (Warping the Pixels)
Keystone Correction is a digital processing technique. Since the projector cannot physically move the light beam, it uses software to "squish" and reshape the image until it looks square.
The Trade-off: While convenient, digital correction discards pixels and can reduce effective resolution. It works well for casual viewing, but purists prefer to avoid it.
Deep dive: Guide to Projector Keystone Correction.
Why You Should Avoid Extreme Angles (If Possible)
Even with top-tier correction tools, projecting from a severe angle (especially from the side) introduces physics problems that software cannot fix.
1. The Focus Uniformity Issue
Projector lenses have a specific depth of field. When you project from a steep angle, one side of the screen is physically closer to the lens than the other. This often results in a "soft" image where one side is perfectly sharp, but the opposite corner is slightly blurry. No digital setting can fix this optical physics issue.
2. The Gamer’s Trap (Latency)
If you are a gamer, avoid heavy digital correction. Processing a slanted image into a square one requires the projector’s chip to recalculate every frame, which can add input lag.
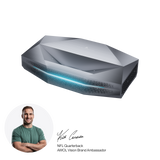
- The Aetherion Advantage: For the best performance, a direct, centered projection is mandatory. This is why the AWOL Vision Aetherion prioritizes a centered UST setup to deliver 1ms Input Lag and Auto Low Latency Mode (ALLM) for instant response times.
Do These Rules Apply to Ultra Short Throw (UST) Projectors?
Standard projectors fight with angles because they sit across the room. UST projectors change the rules entirely.
The Geometry of Short Throw
Because UST projectors sit only inches from the screen, they are highly sensitive to geometry. A tiny nudge of the unit can shift the image significantly. For USTs, precision is key.
Read more: What is Short Throw vs. Long Throw?
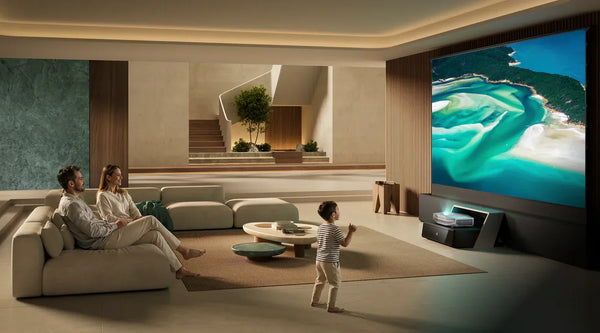
Why UST Removes "Angle Anxiety"
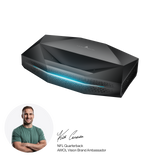
The best way to fix a "bad angle" is to remove the distance that causes it. With a standard long-throw projector, you have to worry about the ceiling fan or the couch blocking the beam. The AWOL Vision Aetherion features a 0.2:1 Throw Ratio, meaning it sits directly at the front of the room. This eliminates the need for side-table placement or complex ceiling mounts entirely.
See the specs: UST Projector Setup Critical Specs.
How to Dial in the Perfect Image
If you must set up in a difficult room, follow these steps to minimize distortion.
Step 1: Physical Placement is King Always try to physically center the projector before touching the remote. The less digital correction you use, the sharper your image will be.
Tool: Calculate Screen Size Based on Seating Distance.
Step 2: Leveling the Unit Use the adjustable feet on the bottom of your unit. A perfectly level projector often solves "trapezoid" issues better than software.
Step 3: Calculating Distance Ensure you aren't placing the projector too far or too close, which forces you to use digital zoom.
Tool: Projector Distance Calculator.
Step 4: The Screen Factor Projecting at an angle onto a wall emphasizes texture and bumps. For a truly flat image, a tensioned screen is essential.
Guide: How to Set Up Projector Screen.
Final Thoughts: Don't Let Geometry Ruin Your Theater

Angles are sometimes unavoidable, but they are always a compromise. While tools like Keystone Correction can save the day in a pinch, the ultimate home theater experience comes from a setup that doesn't need "fixing."
If you want to bypass the headaches of cross-room placement and uneven focus, consider upgrading to the AWOL Vision Aetherion. With 3,300 ISO Lumens, RGB Pure Triple Laser technology, and a design meant for front-and-center placement, it ensures your image is always square, sharp, and spectacular.

Be the First to Know
Subscribe for special deals, news, and important product information, and get your exclusive $50 discount.
Related Articles
Projector Ghosting: The Ultimate Troubleshooting Guide to Sharp, Clear Images
What Is Color Gamut? A Simple Guide to Display Color
10 Creative Ways of Using a Projector
What Is Laser Speckle in Projectors & How to Eliminate It

What is a Smart Projector? (And Can It Replace Your TV?)