













DIY Projector Screen: How to Build One That Actually Looks Good
A DIY projector screen can look much better than a bedsheet on the wall, but only if you control three things: the screen surface, the frame, and the tension. The best DIY projector screen for most people is a fixed wood frame covered with smooth white blackout cloth or projector screen material, finished with a black border. For outdoor movie nights, a PVC frame with grommets and ball bungees is easier to move and store.
Short Answer: The Best DIY Projector Screen Setup
If you want the cleanest result, build a 16:9 fixed-frame DIY projector screen with a straight wood frame, smooth blackout cloth or dedicated screen fabric, even staple tension, and a matte black border. This setup is affordable, rigid, and less likely to wrinkle than a loose sheet.
For a temporary outdoor setup, use a PVC frame, grommets, and ball bungees so the fabric can stay taut while still being easy to take apart. Avoid glossy paint, textured walls, thin bedsheets, and loose fabric. Those options can work for casual use, but they usually reduce brightness, contrast, or image sharpness.
Materials and Tools You Will Need
Start with the screen surface. Your projector screen material affects brightness, color, texture, viewing angle, and how easily the surface stays flat.
Recommended Screen Materials
White blackout cloth: The best all-around DIY choice for most indoor fixed-frame builds. It is smooth, affordable, opaque enough to reduce light bleed, and easier to stretch than a bedsheet.
Dedicated projector screen fabric: A better option if you want a more predictable surface. It usually costs more than blackout cloth, but it can improve uniformity and reduce guesswork.
Spandex: Useful for acoustic transparency when speakers sit behind the screen. It needs a very rigid frame and careful stretching, and some builds use multiple layers to control light bleed.
Projector screen paint: Good only if the wall or board is extremely smooth. Paint will not hide bumps, orange-peel wall texture, seams, nail pops, or waves.
Bedsheets and tarps: Fine for a quick backyard experiment, but not ideal for a polished home theater. Thin sheets can let light pass through, while tarps and low-quality fabric can show wrinkles, texture, and uneven reflections.
Frame Materials
For a permanent indoor screen, use straight 1x3 or 1x4 pine boards, select-grade lumber, or another stable wood. Wood gives you a firm staple surface and enough weight to keep the screen flat.
For a portable outdoor screen, use PVC pipe with elbows, T-joints, feet, and bungees. PVC is lightweight and easy to disassemble, but large screens may flex in wind unless you use thicker pipe and weighted supports.
Basic Tool List
- Measuring tape
- Level or laser level
- Saw or PVC cutter
- Drill and screws
- Corner braces
- Staple gun and staples
- Clamps
- Scissors or utility knife
- Black felt tape or velvet border tape
- Grommet kit and ball bungees for outdoor PVC builds
- Sandbags or weights for outdoor use

Step-by-Step: Build a Fixed-Frame DIY Projector Screen
This is the best build for a clean indoor result.
1. Decide Your Screen Size
Most home theater content is 16:9, so that is the easiest aspect ratio to build around. Measure the wall first, then choose a projector screen size that leaves space around the frame, speakers, furniture, and projector placement.
For common 16:9 screens, approximate viewing-area dimensions are:
| Diagonal size | Width | Height |
|---|---|---|
| 100 inches | 87 inches | 49 inches |
| 120 inches | 105 inches | 59 inches |
| 150 inches | 131 inches | 74 inches |
Before cutting the frame, check your projector's throw distance. A projector has to sit at the right distance to fill the screen without excessive digital zoom or keystone correction.
2. Build a Square, Rigid Frame
Cut your boards to size and assemble a rectangle on a flat floor. Use corner braces to keep the frame square, and add a center brace if the screen is large. If the frame twists, the screen surface will twist with it.
Check both diagonals with a tape measure. If the diagonal measurements match, the frame is square. Sand any rough edges so they do not snag the screen fabric.
3. Lay Out the Screen Material
Place the screen material face down on a clean floor. Put the frame on top of it, also face down. Leave several inches of extra material around every side so you have enough fabric to pull and staple.
If the material has a front and back side, confirm the correct projection side before stapling. This is easy to overlook, and it is annoying to fix after the screen is fully tensioned.
4. Stretch From the Center Outward
Start with two staples in the center of the top rail, then two in the center of the bottom rail. Pull the material taut, but not so hard that it distorts the weave. Repeat on the left and right sides.
Work outward in pairs: top, bottom, left, right. This keeps tension balanced across the surface. Do not staple one entire side first. That is one of the fastest ways to create loose corners and diagonal wrinkles.
5. Add a Black Border
Apply black felt tape or velvet border tape around the viewing area. A black border absorbs slight overscan and gives the image a sharper-looking edge. It also hides minor staple lines or uneven cuts.
6. Mount the Screen Safely
A fixed screen is only as good as its mounting. Use studs, appropriate wall anchors, or a French cleat if the frame is heavy. If you need a deeper mounting walkthrough, follow a dedicated guide on how to hang a projector screen before lifting the frame.
How to Build a Portable Outdoor DIY Projector Screen

An outdoor DIY projector screen has a different job. It has to survive setup, takedown, storage, uneven ground, and wind. Portability matters more than a furniture-grade finish.
Outdoor PVC Screen Build
- Choose a 16:9 size that fits your yard and projector brightness.
- Cut PVC for the top, bottom, sides, and support feet.
- Dry-fit the frame before gluing anything.
- Add T-joints or wider feet so the frame does not tip.
- Install grommets along the screen material.
- Use ball bungees to tension the fabric evenly around the PVC.
- Anchor the base with sandbags or patio weights.
For a larger outdoor screen, consider a wood frame instead of PVC. Wood is heavier and less portable, but it resists flexing and wind better.
Outdoor Setup Tips
Set up after sunset or in deep shade. Even a good screen will look washed out if the projector is fighting daylight, porch lights, or streetlights. Keep the projector level with the screen center when possible, and avoid relying on extreme keystone correction to fix a crooked setup.
When the movie is over, let the fabric dry before storing it. Rolling damp fabric can create mildew, odor, or permanent creases. If you want a cleaner and more reliable outdoor result without building a PVC frame every time, consider the AWOL Vision 120''–200'' Outdoor Portable Fold Matte White Screen. Its matte white surface is designed for backyard movies, camping, and outdoor events, while the portable freestanding design makes setup and storage much easier than a typical DIY screen.

Should You Paint a Wall Instead?
A painted wall can work if the wall is already smooth, flat, and free of texture. It is a good option for people who want a permanent screen area without building a frame.
The catch is that projector screen paint only performs as well as the surface underneath it. If the wall has texture, waves, patched drywall, nail holes, or glossy paint, the projected image will reveal those flaws. Sand, prime, paint carefully, and add a black border if you go this route.
A painted wall is usually best for casual viewing in a controlled room. For a sharper home theater image, a tensioned fabric screen is usually more reliable.
Cleaning and Maintenance
Keep the screen covered or rolled when not in use. Dust can dull the image, and fingerprints can leave visible marks during bright scenes.
For fabric screens, start with a clean microfiber cloth and very light pressure. Avoid harsh scrubbing. If the screen has a coated surface, check the care instructions before using liquid. If you are unsure, follow a dedicated guide on how to clean your projector screen without damaging the material.
For outdoor screens, fully dry the fabric before storage. Store PVC and fabric parts separately so dirty pipe ends do not rub against the viewing surface.
Final Thoughts: Should You DIY or Buy a Projector Screen?
A DIY screen is worth it if you enjoy hands-on projects, have a strict budget, and can control your room lighting. It is also a smart way to test screen size before committing to a more permanent setup.
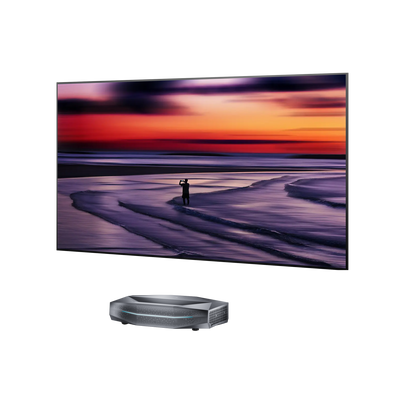
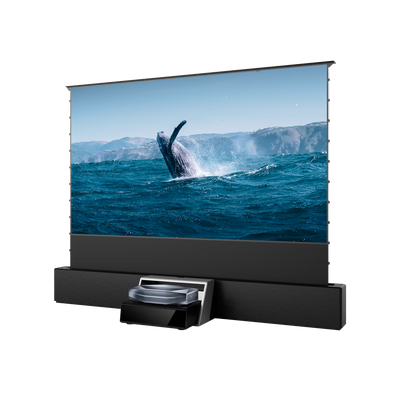
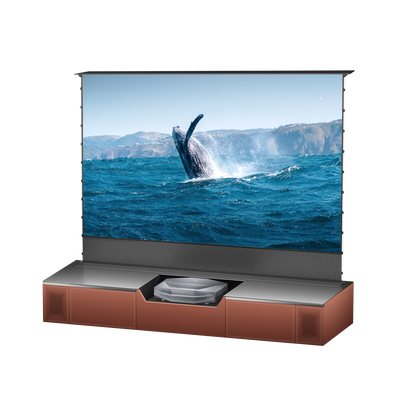
Buying a screen makes more sense when you need a perfectly flat surface, a retractable design, daytime viewing, UST compatibility, or a living-room-friendly installation.If you are choosing a screen for an ultra-short-throw projector, do not judge by material alone. Surface flatness, ambient-light control, and projector geometry matter just as much.
FAQ
What is the best material for a DIY projector screen?
White blackout cloth is the best all-around DIY projector screen material for most fixed-frame builds. It is affordable, smooth, opaque, and easier to stretch than a bedsheet. Dedicated projector screen fabric is better if you want more predictable performance.
Can I use a bedsheet as a projector screen?
Yes, but a bedsheet is best for casual use only. It can wrinkle, let light pass through, and reduce contrast. If you use one, pull it as tight as possible and place a dark backing behind it.
Is a white wall as good as a projector screen?
Usually no. A white wall can work if it is smooth and matte, but wall texture, glossy paint, seams, and small bumps can reduce image sharpness. A tensioned fabric screen is usually flatter and more consistent.
How do I make a DIY projector screen wrinkle-free?
Use a rigid frame and stretch the fabric from the center outward, alternating sides as you staple or fasten it. For outdoor PVC screens, use grommets and ball bungees to apply even tension around the frame.
What size DIY projector screen should I make?
Choose the largest size your projector can fill brightly and your room can support comfortably. For many living rooms and backyard setups, 100 to 120 inches in a 16:9 ratio is a practical starting point.
Be the First to Know
Subscribe for special deals, news, and important product information, and get your exclusive $100 discount.
