


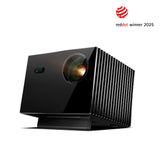


MAKE HOMES
AWE
MAKE HOMES
AWE
 AWOL Vision introduces
  Valerion, its premium sub-brand, under the “One Vision, All Scenes” philosophy. AWOL offers ultra-short-throw projectors for everyday cinematic viewing, while Valerion delivers high-performance long-throw solutions for true home theater. Together, we are united by one mission — to Transform Any Room into
  Your Personal Silver Screen.


HOME
Theater
HOME
Theater


BrightView
Theater
Watch Bright


Hollywood-Grade
Theater
the best
How to choose?


Living Room
Living Room


All-In-One Theater
Living Room Theater
MAN CAVE
MAN CAVE


VisionMaster Pro2
backYard
backYard


StreamMaster Plus 2
Nights Anywhere


Blog

When shopping for laser projectors, you may have come across terms like lux and lumens. While both seem similar and are related to brightness, they are profoundly different.
In a nutshell, lumen measures the total light output from a source, while Lux measures the light intensity per unit area.
This blog aims to demystify the difference between lux vs. lumens so you can choose the ideal metrics.
What Is Lumens
Lumens measure the total amount of light emitted by a light source from a laser or a projector lamp. Similar to water flowing out of a sprinkler.
The lumens denote the projector's total lighting capability. In other words, a higher lumen value means that the light source will be brighter.
In this manner, lumens define the brightness of the particular projector, and such a value allows the comparison between projectors intended to be used based on brightness. For instance, an average projector with a brightness of 3000 lumens will be brighter than an average 2000-lumen projector.
Understanding lumens is vital for selecting the right projector, but knowing about lux and light intensity distribution is also important to determine how bright the projected image will appear on your screen.
Understanding Lux
Lux, in contrast to lumens, measures the light intensity on a surface, specifically quantifying how concentrated light is. For instance, while lumens seem like water flowing from a sprinkler, lux is the water collected in a specific area.
Therefore, lux directly relates to the brightness of the projected image as it appears on your screen. It's about the illuminance of that projected area, the actual light intensity you perceive.
Grasping lux is essential for effective lighting design and projector placement, as it reveals how projector distance and screen size considerably influence perceived brightness.
For instance, a projector with high lumen output may produce a lower lux value—and consequently a dimmer image—if its light spreads across a large screen. In contrast, a smaller screen will concentrate the same projector's light, yielding a higher lux value and a brighter, more vivid image. Thus, while lumens indicate the strength of the projector's light, lux measures how effectively that light illuminates the screen, directly affecting your viewing experience in relation to the setup and screen size.
Lux vs. Lumens: Key Differences
|
Feature |
Lumen (lm) |
Lux (lux) |
|
Definition |
Total amount of light emitted by a source |
Light intensity on a surface |
|
Measures |
Luminous flux (lm) |
Illuminance (lm/m²) |
|
Focus |
Light Source Power (Projector Lamp/Laser) |
Brightness on Screen (Projected Image) |
|
Analogy |
Total Light from a Bulb / Water from a Hose |
Light Intensity on Skin / Paint Thickness |
|
Example Calculation |
5000 lm emitted by a bulb |
5000 lx on 1 m² = 5000 lm total on that area |
Lumens refers to the total visible light emitted by the lamp (bulb), its measurable total, regardless of direction or area in which it is emitted. Lux (lx) is the amount of light incident on a given surface; it is calculated as lumens divided by an area (square meters). This means lumens are source-centric, while lux are surface-centric.
Is 5000 Lux the Same as 5000 Lumens?
No, 5000 lux does not equal 5000 lumens. To think that way is similar to confusing the total quantity of paint in a can (lumens) with the paint thickness on a wall sprayed on (lux).
- Suppose you project 5,000 lumens onto a small screen. The light will become concentrated on that tiny screen, and the lux value will be correspondingly higher (bright image).
- While if you project the same 5,000 lumens onto a big screen, the light gets spread out over a larger area and diluted, giving a corresponding lower lux value (dim image).
Lux vs. Lumens: Relationship and Conversion
The relationship between lumens and lux is governed by the formula:
Lux = Lumens / Area (in square meters)
Thus, a projection screen with an area of 5 m² and receiving 5000 lux of uniformly distributed light would have 25,000 lumens (5000 lux times 5 m²) of total light falling on it, assuming that all light is reflected without loss.
ISO Lumens: A Reliable Measurement
ISO lumens are a standardized measure of how bright a projector is. The International Organization for Standardization (ISO 21118:2020) issued and defined them as the worldwide standard for measuring brightness.
ISO Lumens denotes the measure of projector brightness according to suitable international standards. ISO Lumens are measured in accordance with a defined, stringent, and internationally recognized canon, which ensures higher consistency and comparability across brands and regions.
Why ISO Matters for Consumers: ISO Lumens allow for a more accurate comparison of brightness in projectors and one that will be upheld across the globe, thereby saving consumers from being duped into purchasing based on misleading "peak lumens" or "light source lumens.”
At AWOL Vision, we use ISO Lumens to define brightness specifications for our UST Laser Projectors. With 3000 ISO lumens, the LTV-3500 Pro guarantees a daytime viewing experience.
Other Crucial Projector Specifications
Brightness is not everything. Instead, it is one of the several important factors.
- Resolution (1080p, 4K): The greater the resolution, 1080p or 4K, refers to a clearer picture with more graphical detail.
- Contrast Ratio (Native vs. Dynamic): This ratio explains how deep the blacks are and how dense a picture could be regarding whiteness; in other words, the greater the contrast, the more brilliant the white. Native contrast is the true level, while dynamic contrast adjusts based on the scene.
- Color Accuracy and Gamut: Color accuracy and gamut make colors appear true-to-life and vivid.
- Throw Ratio (UST Specific): Throw ratio refers to the distance between the projector and projection surface. For these types of projectors, UST actually means how big a screen may be projected at a fairly short range.
- HDR Support: HDR means higher brightness, contrast ratio, and color accuracy, which, together, produce vibrance and detail.
Making Informed Projector Choices
Knowing the differences between lux vs lumens is important for making an informed decision about a projector. Lumens refer to the amount of light emitted, while lux means the amount of illuminated light on a specific area.
There is also the ANSI lumens term regarding the measurement of lumens. ANSI stands for American National Standards Institute, which standardized a system for measuring brightness.
In addition to brightness, factors such as contrast ratio, resolution, HDR, etc., are also important to create a brighter and clearer picture.
You now know everything about projector brightness, thus making you capable of choosing wisely with confidence.

The Amazon Fire Stick is a very small but effective streaming device that enhances the home entertainment system. Sit home and watch your favorite movies and TV shows on the projector. Setting up an Amazon Fire Stick is pretty simple.
This guide takes you through all the steps on how to use Amazon Fire Stick and set it up on your projector, so keep on reading until the end.
What You Need to Get Started
You’ll need the following items before getting started:
- Amazon Fire Stick device and remote
- Projector with HDMI port
- Stable Wi-Fi connection
- The power source (USB cable or adapter)
Step-by-Step Guide to Set Up the Amazon Fire Stick on Your Projector
Follow these detailed steps on the Amazon Fire Stick setup to connect and configure your device with your projector:
Connect the Fire Stick to the Projector’s HDMI Port:
You will need to connect an Amazon Fire Stick to your projector using the HDMI port. You can look for the HDMI port of the projector because it is mostly labeled as something like HDMI 1. Just pop the Fire Stick into its HDMI port. Check whether your projector has a mini or a standard HDMI port.
Power the Fire Stick:
The next step is to power the Fire Stick on. In case your projector has a USB port, you could connect with the USB using the included USB cable to the projector directly. Otherwise, you will need a power adaptor. Connect one end of the USB cable to the Fire Stick and the other end to the adaptor. Plug it into a wall outlet. Either way, your Fire Stick powers on.
Select the Correct Input Source on the Projector:
Now that the Fire Stick has switched on locate the input source button on the remote and select the correct HDMI input source. If everything works perfectly, it will now reflect whatever you are watching on your Fire Stick on the projector screen. However, in case it shows no signal, check the connection before confirming if it is powered on.
Pair the Fire Stick with Your Wi-Fi Network:
When it turns on, the Fire Stick prompts you to connect to a Wi-Fi network immediately. Choose your connection from the list and enter package credentials. If the problem persists after checking signal strength, move the projector or router closer together.
Sign in to Your Amazon Account:
After establishing a network connection, sign in with your Amazon account credentials. This will grant you access to various streaming services and apps available on the Fire Stick. If your projector supports voice commands, you can use Alexa to navigate.
Optimizing Your Experience
- Adjusting Projector Settings for Best Picture: Fine-tune your projector's focus, resolution, and screen size settings. Position the projector so it is at the correct distance from the screen for a clear and appropriately sized image.
- Using Alexa with the Fire Stick: You may use Alexa if your projector supports such a function. Search for your favorite content using voice commands, play music, and do volume adjustments using the Fire Stick.
- Troubleshooting Common Issues: You would want to check that all connections are tight and that you have selected the intended input source if you happen to find a blank screen or sign. If your Fire Stick is unresponsive without power, confirm the device is indeed plugged into an outlet. And if there are sound or poor video quality issues, you should verify that Wi-Fi connection is stable.
Additional Features and Tips
Casting Content from Other Devices: To enable casting with the phone, make sure that the Fire Stick and your device share the same Wi-Fi connection. Select Fire Stick as your main casting device and select the content to be cast.
Using Third-Party Apps: If you haven't had specific apps like Netflix or YouTube on your Amazon Fire Stick, you might find them in the Find or Search sections of the home screen. Search Netflix or any other app you wish to install and select the particular app. Click on Download to install it into your Fire Stick. Regularly update these apps to ensure optimal performance and access to the latest features.
Conclusion
Setting up an Amazon Fire Stick for your projector is simple and fast. In just a few minutes, you will be able to catch up with your favorite shows on the big screen. Any novice can connect their Fire Stick, adjust the projector settings, and solve simple troubleshooting issues by following this detailed guide.
Explore advanced features such as Alexa voice control, third-party applications, and screen mirroring to enjoy the experience at an entirely different level. Your setup is now complete; kick back and watch movies, shows, and a whole lot more streamed into your projector, hassle-free!

Projectors can create massive 120-inch viewing experiences that dwarf most flat-panel TVs. This immersive display can change your viewing experience completely, though many users end up with unclear images.
Dust on the lens and resolution mismatches often turn your home theater dream into a frustrating blur. Your projector's image quality might suffer from focus problems, screen surface irregularities, and too much keystone correction.
Getting crystal-clear projector images is simpler than you might think. The right adjustments can dramatically improve your viewing experience, whether you have a blurry picture or just want to optimize your setup.
Want to realize your projector's full potential? These proven techniques will help you get the sharp, clear image you've been looking for.
Prepare Your Viewing Space
You need the right lighting setup to create a perfect viewing environment. Room lighting can affect your projection quality a lot, especially light from windows, doors, and artificial sources. Blackout curtains will help you block outside light and get the best clarity. An ambient light-rejecting (ALR) screen will keep your images vibrant even when the room is bright.

Your eyes will thank you if you add some backlighting behind your screen for night viewing. It helps reduce strain during long viewing sessions. The distance between your projector and screen plays a role too - images get dimmer as the projector moves further back.
Control room lighting
Your projector needs different brightness levels as the day goes on. You'll want higher settings during daytime to keep images clear. Light management is a vital part of keeping image quality steady. Dimmer switches give you better control over your room's artificial lighting.
Choose ideal wall color
The projection surface color makes a big difference in image quality. Dark, matte colors are your best bet since they cut down on light bouncing that can wash out dark areas. Here are some specialized paint options for dedicated projection surfaces:
-
White projector paint (gain value 1.24) to get high-resolution images
-
Gray projector paint that gives better contrast and darker blacks
-
Light gray paint that works well in rooms with some ambient light
The paint finish is just as important as its color - stick to matte to avoid unwanted reflections. When you combine good lighting control with the right wall color, you'll get crystal-clear projector images.
Master Focus Settings
Getting the focus just right is essential for enjoying crystal-clear projector images! Modern projectors offer you a variety of ways to achieve that perfect focus. We can adjust it using manual controls or take advantage of the advanced auto-focus features available.
Manual focus techniques
The focus wheel proves to be the most reliable tool to get precise image clarity. You'll find it near the projector lens, where it lets you make fine-tuned adjustments until the image looks sharp. Here are the steps to get optimal results:
-
Let the projector warm up for 20 minutes before adjusting
-
Project a focus pattern or text onto your screen
-
Turn the focus wheel slowly while observing the center of the image
-
Fine-tune until text appears crisp and individual pixels become visible
Auto-focus features
Modern projectors use Time-of-Flight (ToF) technology to adjust focus automatically. This system calculates the exact distance between the projector and screen with LED or laser light, which then adjusts the lens to get optimal clarity. The ToF sensor needs just milliseconds to complete these calculations and ensures consistent image sharpness even if you move the projector.
Digital focus tools
Digital focus patterns are great tools to get precise calibration. These patterns show grid lines or test images designed specifically to adjust focus. The center of the screen should be your first focus point since it displays most of your content.
Some projectors let you adjust focus with a remote control, which helps you make precise changes from where you sit. Several models can even save focus settings for specific projection distances, so you won't need to keep adjusting.
Focus problems often have simple solutions. Your projector should sit parallel to the screen surface. If one side looks blurrier than the other, check how the projector lines up and adjust its position. The original step is to reset any keystone corrections because too much keystone adjustment can affect the overall image clarity.
Clean the Projector Lens
A clean projector lens is crucial. Imagine watching a movie through a foggy window—dust and smudges blur every detail. Gently wipe your lens with a soft microfiber cloth and lens cleaner to restore clarity. This simple step enhances image sharpness and ensures your projector delivers a crisp, vibrant display every time. For more tips about how to clean your projector lens, you can check this blog.
Use Advanced Picture Tools
Keystone correction helps you get rectangular images, especially when you have a projector that isn't perfectly arranged with the screen. This feature fixes distortions along vertical, horizontal, and rotational axes. Your displays stay crisp even in difficult setups.
The best results come from placing your projector as close to center arrangement as possible. You should adjust the physical placement first by moving it up, down, left, or right. After positioning, use keystone correction to fine-tune the image shape. You won't need much of either.
Keystone correction tips
Physical adjustments work better than extensive digital corrections to maintain image quality. The correction process scales and processes the image, which affects overall clarity. These guidelines are a great way to get the best results:
-
Start with vertical adjustments for top/bottom distortion
-
Use horizontal correction for side-to-side arrangement
-
Apply rotational correction only to fix corner misalignment
Modern projectors come with automated solutions that utilize Time-of-Flight (ToF) technology. This advanced feature measures distances faster and adjusts images automatically when the projector moves. You won't need manual calibration.
Note that too much keystone correction can cause subtle quality losses. The process uses fewer pixels to create the image and might soften the display. Physical positioning should be your first choice to minimize keystone adjustments.
Side projection setups benefit from 2D keystone correction when you place the projector next to a sofa. 3D keystone correction becomes crucial to fix diagonal or corner misalignments. Your images will look perfect whatever the projector's position.
Match Source and Display
The right projector display settings matched with your source device will give you the best image clarity. Full HD resolution works well for screens up to 40 inches. Screens larger than 100 inches need 4K UHD resolution to show better detail.
Set correct resolution
Your image sharpness depends on the right resolution settings. You can find the recommended resolution for your projector in your device's display settings. Modern projectors can handle many resolutions from 720p to 4K UHD and adapt to different types of content.
Pick the right input ports
The ports you choose will affect how good your viewing experience is. HDMI is your best option because it delivers high-quality digital video and audio signals. Here are the ports you need for the best connection:
-
HDMI - For high-definition video sources
-
DisplayPort - A modern alternative to DVI
-
USB - Plays media directly
-
Network port - Makes remote control and updates easier
You can use adapters if your devices have different ports. The secret is to pick cables that work with both your source device and projector.
Update firmware regularly
Your projector will work better and stay secure with regular firmware updates. These updates add new features, fix problems, and work better with different devices. You should set up a regular schedule to update your projector.
Remember to save your current settings before updating and let the update finish without interruption. It's smart to test new firmware on one device first to avoid any problems with compatibility. Good firmware maintenance keeps your projector running at its best with proper security.
Conclusion
Sharp projector images depend on several factors working together. Your viewing space needs good light control with blackout curtains and ALR screens. The right focus settings ensure crisp details across the screen.
Picture tools like keystone correction help create perfect geometry. The physical placement of your projector plays a crucial role in getting the best results. The source resolution must match your projector's native output, and keeping firmware up to date ensures peak performance.
Getting crystal-clear projector images is simpler than you might think. A few tweaks to your room setup, focus settings, and display options can make a huge difference in quality. Take it one step at a time - adjust, test, and fine-tune until the image looks just right.
These tried-and-tested methods unlock your projector's full potential and transform any room into an impressive home theater. You'll enjoy the clearest possible projection whether you're watching movies, giving presentations, or playing games.
FAQs About the Clarity of Your Projector
Q1. How can I improve the clarity of my projector's image?
To enhance image clarity, adjust the focus using the focus wheel or auto-focus feature, clean the lens regularly, and position the projector at the optimal distance from the screen. Also, ensure proper keystone correction and use the correct resolution settings for your content.
Q2. What are some tips for optimizing my projector's viewing environment?
Control ambient light using blackout curtains or an ALR screen. Choose a dark, matte color for your projection surface, and consider using specialized projector paint. Adjust your projector's brightness settings according to the room's lighting conditions.
Q3. How important is the choice of input ports and cables for projector performance?
The right input ports and cables are crucial for optimal performance. HDMI is the primary choice for high-quality digital video and audio. Use appropriate adapters if needed, and ensure your cables match both your source device and projector's capabilities for the best viewing experience.
Q4. Can firmware updates really improve my projector's performance?
Yes, regular firmware updates can significantly enhance your projector's performance. They often introduce new features, fix bugs, and improve compatibility with various devices. Establish a consistent update schedule, but remember to back up your current settings before updating.
Q5. How does keystone correction affect image quality, and how should I use it?
While keystone correction helps achieve rectangular images, excessive use can impact overall clarity. Use it sparingly and prioritize physical positioning of your projector. Apply vertical adjustments for top/bottom distortion, horizontal correction for side-to-side alignment, and rotational correction only when dealing with corner misalignment.

HDMI cables are the lifeline of your smart devices, connecting with televisions, gaming consoles (be it PS or XBOX), and streaming devices. They are super critical! Interestingly, not every other HDMI cable will be of help to you. Of course, the right HDMI cables can make your audio and video just great! How do you pick? This blog will take you through several types of HDMI cables, like standard HDMI and micro HDMI cables, and will also give a bit of insight into choosing the best HDMI cable for your situation.
What Is an HDMI Cable?
The HDMI (High-Definition Multimedia Interface) cable is a universal standard for interconnection designed to transmit audio and video data in digital form from sources like TV sets, computer monitors, video projectors, etc. Although all HDMI cables function mainly as audio and video conduits, the differences in design and features account for all parameters governing the choice of one cable or another to fulfill our performance requirements.
Types of HDMI Cables
To select an ideal HDMI cable, one must know the different types. The classifications given are based on the HDMI version and the signal transfer speed, which is sometimes termed the bandwidth.
Here is an enumeration of the most common HDMI cables with specifications:
Standard HDMI (Type-A)
Connector: The most widely used rectangular connector.
Versions:
-
HDMI 1.0 to 1.2a: Basic digital audio/video transmission.
-
HDMI 1.3 to 1.4a: Features higher resolution, Deep Color, and Audio Return Channel (ARC).
-
HDMI 2.0 to 2.0b: Offers 4K at 60 Hz, HDR, and advanced audio formats.
-
HDMI 2.1: Offers 8K at 60 Hz and 4K at 120 Hz, with advanced features such as Variable Refresh Rate (VRR) and Dynamic HDR.
Mini HDMI (Type-C)
Connector: The connector is a smaller version of Type-A, intended for compact devices.
Use case: Found in camcorders, tablets, and DSLR cameras. It transfers the same performance as standard HDMI but is designed to fit in a portable size.
Micro HDMI (Type-D)
Connector: The tiniest HDMI connector there is.
Use case: Best for smartphones, tablets, and small cameras, where there are really tight fit requirements.
HDMI with Ethernet (with or without ARC)
Feature: Includes an Ethernet channel to enable internet connectivity via HDMI. This feature allows for all HDMI-connected devices to share one Ethernet connection.
Versions: Comes in HDMI 1.4 and later versions.
High-Speed HDMI Cables
Bandwidth: Supports 10.2 Gbps and more; good for anything up to 1080p, 4K, 3D, Deep Color, and Audio Return Channel-ARC.
Certification: High-Speed HDMI or Premium High-Speed HDMI branding for 2.0 and above.
Ultra High-Speed HDMI Cable
Bandwidth: Supports 48 Gbps, which is a requirement for HDMI 2.1 features like 8K resolution, high frame rate, and enhanced audio return channel-EARC.
Certification: An HDMI cable marked with the Ultra High-Speed HDMI logo accords with the expected criteria of HDMI 2.1 devices.
How to Choose the Right HDMI Cable
With knowledge of HDMI cable types, the next step is to decide the most suitable one.
-
Resolution support: When connecting a 4K quality television, the cable should also support 4K resolution (in which case that should be High-speed HDMI for any format below). Use Ultra High-speed HDMI for the 8K.
-
Refreshable time rate: Gamers should use HDMI 2.1 cables to get the best refresh rates (4K at 120 Hz or 8K at 60 Hz).
Tips for HDMI Cable Maintenance:
The care and maintenance of an HDMI cable will increase its lifespan and provide an uninterrupted performance.
-
Avoid extreme bending: Do not bend your HDMI cables with great vigor; doing so might damage internal wiring.
-
Unplug when necessary: Unplugging the HDMI cable when not in use reduces wear on connectors.
-
Keep cables away from heat: Don't place cables near any heat source, such as a radiator, or in direct sunlight; high-temperature extremes may damage the cable.
-
Clean the connectors: It would help if you used a soft cloth to wipe the connectors and HDMI cable free from dust and grime, as these cause unwanted quality interruptions on cable performance.
-
Store cables properly: Coil the HDMI cables loosely to avoid internal wire damage when storing them.
Bottom Line
With good insight into the various types of HDMI cables and types of HDMI ports, you can pick wisely for your home entertainment or gaming setup. Whether you need Standard HDMI, Mini HDMI, Micro HDMI, or Ultra High-Speed HDMI, match your needs properly to ensure an awesome audio and viewing experience.
Check out your existing setup, and if you are upgrading to something new, now is a good time to invest in that HDMI cable!

Playing video games together isn’t just for the hardcore gamer couples. Whether you’re looking for a fun way to bond after a long day or seeking an exciting new hobby to share, video games offer something for everyone. From cooperative puzzle-solving to friendly competition, games create the perfect environment for connection, laughter, and a little healthy rivalry. In fact, gaming can even help strengthen your relationship, enhancing teamwork and communication in a fun and relaxed way.
With Valentine’s Day just around the corner, why not switch up the usual celebration? Instead of the traditional dinner date, consider playing a video game together. It’s a great way to create new memories and enjoy some quality time as a couple—without the usual distractions. Let’s dive into some of the best video games for couples—games that promise not only entertainment but also an opportunity to connect and have fun.
Why Couples Should Game Together?
Playing video games together offers more than just fun—it can actually strengthen your relationship. For one, gaming improves communication. Many games require teamwork to solve puzzles or complete challenges, sparking conversation and helping you collaborate.
It also encourages problem-solving and shared accomplishments. Working together to overcome obstacles can build trust and create a sense of partnership. Plus, video games add excitement to date nights, breaking away from the usual routine and giving you both something new to enjoy.
In short, gaming isn’t just a way to pass the time—it’s an opportunity to connect, communicate, and share memorable experiences.
Top Recommendations for Video Games for Couples
For a memorable Valentine's Day with your partner, here are some video game recommendations that are both fun and conducive to couple bonding:
-
It Takes Two – That is a game that requires two players; great for couples. It received the “Game of the Year” in 2021 because of its cooperative two-player gameplay mechanics where players have to cooperate to advance. Chiefly, it shows the adventures of a couple – Cody and May who turn into dolls and have to face different trials in their house, which becomes an immense playground. But this game is not only cooperative but also has an emotional plot in the form of relationship development.
-
Stardew Valley – if you prefer something more slow-moving and multiplayer-focused for the long term, there’s the co-op mode where you can run a farm together with others. People may build homes, fences, roads, shops; farm animals and crops; fish in lakes and seas; mine for ores and minerals, and forge friendships and relationships with other players in a single virtual town. This is perhaps a wonderful opportunity to enjoy such things as constructions of your farm, constructions of houses for your avatars, weddings for your avatars as well as your own real-life Valentine’s Day celebrations.
-
Lovers in a Dangerous Spacetime is a game in which you have to work as a team. Both of you control a spaceship, and you have different roles, such as navigation, shields, or weapons. It’s not only cooperative but necessary to communicate the dangers of space, making it the perfect analogy for a relationship. The art style is also fun, with its bright, or, in other words, colorful look.
-
Overcooked 2 is a kitchen cooperative frenzy survival game for couples who like a bit of hysterical fun and crazy. The show is an excellent exercise in communication and organization; it’s funny and sometimes touching. The game's levels are arranged to be difficult so as to compel individuals to depend on one another.
-
A Way Out is another narrative-based cooperative game in which two protagonists, prisoners, have to escape from prison. Playing the game entails coordinating their operations; hence, every operation is a collective work. The arc is interesting to discuss and can generate profound conversation or laughter about the situation in particular scenarios.
-
Spiritfarer – The game in which you are Stella, the Spiritfarer who another person can join as a Daffodil, the cat spirit. It’s a warm management game that tells a story about life, death, and friendship on top of everything. The cooperative aspect is creating and sailing a boat for spirits, which might create opportunities for talking with your partner about the game’s themes.
-
Snipperclips is the name, an amalgamation of snip, clip, and the word pair, “Cut it out!” (Switch). This is a Video game genre that requires the player to physically rotate or move the body of the characters to solve puzzles. While it is easy to do, it calls for teamwork and coordination, and as you solve each problem together, you find yourself laughing.
-
Haven – A game is relatively older than the previous RPG where a couple, Yu and Kay, escape to a strange planet to express their love for one another freely. He boils character interaction and progression of the overall storyline into three broad major categories: exploration, combat, and resources management when coupled with relation status. The personnel themes offer the greatest combination of action, adventure, and romance which would be great for gaming together with a partner.
-
Unravel Two—This sequel features cute yarn characters. Players focus on cooperation to overcome challenges on different levels. The game is also best enjoyed in co-op, where only two players are allowed. In that case, each controls one character, and you have to switch between characters. It is artistic and leaves one with good feelings, as it focuses on aspects of friendship.
-
Portal 2 – Although Portal 2 isn’t a co-op-only game, it has one of the best co-op campaigns in puzzle solving in gaming. It was a fun(team-based) and enjoyable experience where you and your wife would work on difficult problems with guidance and continuous comedies from the game’s artificial intelligent character, GLaDOS. That can mean some great problem-solving sessions together.
Each of these games offers something different - from the strategic and story-driven to the light-hearted and puzzle-focused. They're designed to bring you closer, whether through shared triumphs over challenges or through the narrative's exploration of relationships and teamwork.
Tips for Enjoying Video Games Together
To make the most out of your gaming sessions as a couple, here are some practical tips that will ensure you both have fun and connect:
Choose games you both enjoy
It’s important to pick games that both partners are excited about. Take turns suggesting games and find a balance between shared interests. Whether it's cooperative play or friendly competition, mutual excitement is key.
Set some friendly ground rules
If one of you is more competitive than the other, make sure to keep things light-hearted. You can take turns, create challenges, or even team up to tackle tough levels. The goal is to have fun, not to win at all costs!
Take breaks
Gaming can get intense, so don’t forget to pause for breaks. Stretch, chat, and refresh your energy. This helps avoid frustration and keeps things enjoyable in the long run.
Create the right atmosphere
Make your gaming setup as comfortable and immersive as possible. Dim the lights, grab some snacks, and set up a cozy spot to play together.
Invest in the right equipment
To really level up your gaming experience, consider using a projector. A large screen and vibrant visuals can make a huge difference, especially for action-packed or story-driven games.
For the best gaming projector, we recommend the AWOL Vision LTV-3500 Pro. This projector offers incredible 4K resolution, low input lag, and high refresh rates, ensuring smooth gameplay. With its Dolby stereo surround sound and high brightness, it’s perfect for day or night gaming. Whether you’re battling in a fast-paced game or enjoying a relaxed session, the AWOL Vision LTV-3500 Pro will take your gaming to the next level.
By following these tips and setting the right environment, you’ll be sure to create lasting memories and deepen your bond through gaming.
Game Over… Or Just the Beginning?
Video games offer a unique and enjoyable way for couples to connect, unwind, and have fun together. Whether you're tackling a challenging puzzle in co-op mode or racing each other in a friendly competition, gaming brings excitement and teamwork into your relationship. With the right games and a bit of planning, your gaming sessions can become a regular, memorable part of your time together.
Investing in a great setup can elevate your gaming experience. A projector like the AWOL Vision LTV-3500 Pro can transform your gaming nights into a full-blown cinematic experience, enhancing the visuals, sound, and overall enjoyment.
So, this Valentine’s Day, why not skip the usual date night and dive into the world of gaming together? It’s not just about playing games—it’s about creating shared moments, having fun, and building a deeper connection. Grab your controller (or two), and let the games begin!